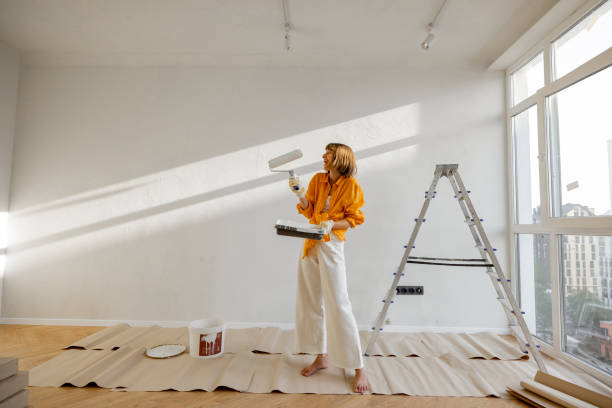
Painting your home can be an exciting yet challenging task, especially for beginners. With the right approach, anyone can achieve professional-looking results. Below are essential tips and tricks to guide you through your first painting project.
Start with Proper Planning
- Determine Your Goals: Are you repainting to refresh the space or completely change its look? Decide on colors and finishes that meet your vision.
- Estimate Materials: Measure the walls or surfaces you’ll paint to calculate how much paint you’ll need. As a rule of thumb, one gallon of paint covers approximately 350-400 square feet.
- Set a Budget: Include costs for paint, tools, drop cloths, painter’s tape, and other materials.
Invest in Quality Paint
All paints are not created equal, and using low-quality options can lead to poor coverage or uneven results. Choose high-quality paint that offers durability and color retention over time. Look for brands known for consistency.
Prepare Your Space Before Painting
Preparation is key to achieving smooth results. Skipping this step often leads to unsatisfactory outcomes and additional cleanup later.
- Clear the Area: Move furniture out of the room or place it at the center covered with drop cloths.
- Clean Surfaces: Wipe down walls with a damp cloth or mild detergent solution to remove dirt, grease, and dust.
- Repair Imperfections: Fill any cracks or holes with spackle or filler and sand them until smooth.
- Tape Off Edges: Use painter’s tape around trim, windowsills, baseboards, and other areas where clean lines are essential.
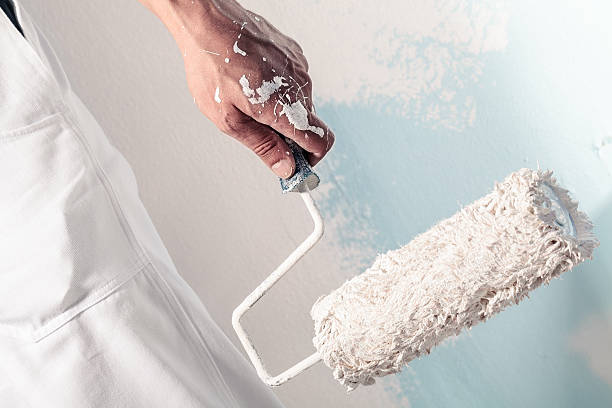
Use the Right Tools
| Tool | Purpose |
| Paint Rollers | For large flat surfaces like walls |
| Brushes | For corners, edges, and detailed work |
| Painter’s Tape | To create sharp lines |
| Drop Cloths | To protect floors and furniture |
| Paint Trays | For even application when using rollers |
Practice Proper Techniques
- Work in small sections of 3-4 feet at a time.
- Apply paint in “W” patterns when using rollers to avoid streaks.
- Maintain an even pressure on brushes or rollers throughout each stroke.
Allow Sufficient Drying Time
- Follow instructions regarding drying times between coats (typically 2-4 hours).
- Use fans or open windows to improve ventilation while ensuring adequate drying conditions.
By starting small and following these tips closely, beginners can achieve great results without feeling overwhelmed by the process of house painting.
Choosing the Right Paint Types and Finishes with a Painting Company Toledo OH
Choosing the right type of paint and finish is crucial for achieving the desired look, durability, and functionality of your project. Each paint type and finish serves a specific purpose, making it important to understand their characteristics before making a decision.
Types of Paint
Paint can be broadly categorized into two main types: water-based (latex) and oil-based (alkyd). Both have distinct properties that make them suitable for different applications.
- Dries quickly (typically within an hour).
- Easy to clean with soap and water.
- Low odor due to reduced volatile organic compounds (VOCs).
- Resistant to cracking and fading over time.
- Best for interior walls, ceilings, and areas with high humidity.
- Provides a smoother finish with better leveling properties.
- Durable and resistant to wear, making it ideal for high-traffic areas.
- Requires mineral spirits or turpentine for cleanup.
- Takes longer to dry compared to water-based options.
- Suitable for trim, doors, cabinetry, and furniture.
Common Paint Finishes
| Finish Type | Characteristics | Best For |
| Flat/Matte | Non-reflective; hides imperfections well | Ceilings, low-traffic rooms |
| Eggshell | Soft sheen; easy to clean | Living rooms, dining areas |
| Satin | Slightly more reflective than eggshell; durable | Kitchens, bathrooms |
| Semi-Gloss | Noticeable shine; highly durable | Trim, doors, cabinets |
| High Gloss | Very reflective; provides a polished look | Furniture, decorative accents |
Matching Paint Types with Surfaces
- Drywall: Latex paint is most commonly used due to its quick drying time and ease of application.
- Wood: Oil-based paint works well on wood surfaces as it provides durability against scratches.
- Metal: Use rust-inhibiting primers followed by latex or oil-based paints depending on the desired finish.
- Concrete/Masonry: Specialized masonry paints are ideal since they handle expansion/contraction effectively.
Key Tips When Selecting Paint
- Always consider the environmental conditions where the paint will be applied (e.g., moisture levels in bathrooms/kitchens).
- Test colors on small sections before committing to ensure compatibility with lighting in your space.
- Invest in high-quality paints as they often provide better coverage and longevity.
By understanding these factors about paints and finishes, you can ensure that your project results not only meet aesthetic expectations but also hold up over time under varying conditions.
Choosing the Right Paint Types and Finishes for Interior & Exterior Painting Toledo OH
Selecting the right paint type and finish is a crucial step in ensuring that your painting project achieves the desired aesthetic, durability, and functionality. With a wide array of options available, understanding their differences can help you make informed decisions tailored to your specific needs.
Common Types of Paints
- Characteristics:
- Easy to clean with soap and water
- Low odor compared to oil-based paints
- Quick-drying
- Interior walls and ceilings
- Areas prone to moisture when labeled as mildew-resistant
- Characteristics:
- Durable with a smooth finish
- Takes longer to dry than water-based options
- Requires solvents like mineral spirits for cleanup
- High-traffic areas such as hallways and trim work
- Surfaces exposed to wear or outdoor elements
- Specialty Paints
Examples include chalk paint, epoxy coatings, or heat-resistant formulations: - Ideal for niche applications like furniture restoration, garage floors, or fireplaces.
Choosing the Right Finish
| Finish Type | Appearance | Best Used In | Key Features |
| Flat/Matte | Non-reflective, smooth texture | Ceilings, low-traffic rooms | Hides imperfections but less durable |
| Eggshell | Slightly reflective | Living rooms, bedrooms | Subtle sheen with moderate durability |
| Satin | Soft sheen | Kitchens, bathrooms | More durable than eggshell; resists moisture |
| Semi-gloss | Noticeable shine | Trim work, doors | Easy to clean; withstands wear |
| High-gloss | Very shiny | Cabinets, furniture | Highly durable but shows surface imperfections |
Factors to Consider When Selecting Paint Types and Finishes
- Room Functionality: Spaces such as kitchens or bathrooms benefit from moisture-resistant finishes like satin.
- Surface Condition: Matte paints help mask flaws on imperfect surfaces.
- Desired Aesthetic: High-gloss finishes create a sleek appearance but may not suit every style.
- Durability Needs: High-traffic areas call for more resilient options like oil-based or semi-gloss paints.
- Light Reflection: Glossy finishes reflect more light while matte options absorb it.
Understanding the distinctions between paint types and finishes enables you to achieve long-lasting results while enhancing your space’s visual appeal. By carefully considering your project’s requirements before purchasing materials, you can ensure both functionality and style in every corner of your home.
Preparing Your Space Effectively for a Smooth House Painting Toledo OH Process
Proper preparation is the foundation of a successful painting project. Whether you’re painting a single room or an entire house, taking the time to prepare your space ensures better results, minimizes mess, and saves time in the long run. Below are essential steps to help you prepare your space effectively.
Clear the Area
- Furniture: Move larger pieces of furniture out of the room whenever possible. If they cannot be removed, gather them in the center of the room and cover them with drop cloths or plastic sheeting.
- Wall hangings: Take down artwork, mirrors, clocks, and other wall-mounted items.
- Decorative objects: Remove smaller items such as lamps, vases, rugs, and curtains.
Protect Surfaces
- Use painter’s tape to mask off edges around windows, trim, baseboards, outlets, and light switches.
- Lay drop cloths or heavy-duty plastic sheeting on floors to shield them from paint drips.
- Wrap door handles or fixtures in plastic wrap or painter’s tape for added protection.
Pro tip: Avoid using lightweight materials like newspapers for floor coverage as they can easily slip or tear.
Clean Walls and Surfaces
- Dusting: Dust walls with a microfiber cloth to remove loose dirt.
- Washing: For greasy areas (such as kitchens), wash walls with a mild detergent mixed with water. Rinse thoroughly with clean water to remove soap residue.
- Drying: Allow walls to dry completely before proceeding.
Repair Imperfections
- Fill small nail holes using spackling paste or wood filler.
- Sand rough spots lightly using fine-grit sandpaper until smooth.
- Patch larger holes with drywall compound and let it dry fully before sanding.
Tip: Use a sanding block for better control when smoothing patched areas.
Prime Where Necessary
| Situation | Primer Type Recommended |
| Painting over dark colors | Tintable latex-based primer |
| Covering stains (e.g., watermarks) | Stain-blocking oil-based primer |
| New drywall | PVA (polyvinyl acetate) primer |
Primers create an even base layer that reduces inconsistencies caused by surface variations.
Organize Tools Before Starting
- Drop cloths/plastic sheeting
- Painter’s tape
- Paintbrushes (angled brushes for edges)
- Rollers (choose nap length based on texture)
- Ladder/step stool
- Sandpaper/sanding block
- Spackling/patching tools
- Paint trays/liners
- Rags for cleaning up spills
Organizing these tools makes it easier to focus entirely on painting without interruptions.
By dedicating time upfront to preparation tasks like clearing spaces, cleaning surfaces, addressing imperfections, and priming where needed—your project will progress smoothly while achieving professional-looking results effortlessly.
Mastering Advanced Painting Techniques for Professional Results
Achieving professional results in your painting projects requires more than just selecting the right color or tools. It’s about refining your technique and understanding advanced methods that can elevate the final outcome. Below, we explore several advanced painting techniques, tips, and considerations to help you produce polished, high-quality work.
Layering for Depth and Durability
- Thin Initial Coat (Priming): Begin with a primer to provide a smooth base and enhance adhesion.
- Base Color Application: Apply the base color evenly using long, consistent strokes.
- Secondary Layers: Build up thin layers of paint until you achieve the desired richness.
- Drying Time: Allow adequate drying time between coats to avoid uneven surfaces or peeling.

Blending Techniques for Seamless Transitions
- Work with Wet Paints: Blending works best when paints are wet; ensure your workspace allows enough time before drying begins.
- Use Specialized Brushes or Sponges: Round brushes or sponges can help soften edges between colors.
- Feathering Technique: Lightly drag brushes across transition lines to create soft gradations.
- Experiment on Test Surfaces: Practice blending on scrap pieces before applying it directly to walls or furniture.
Faux Finishes for Decorative Appeal
Faux finishes mimic natural textures such as marble, wood grain, or stone. These decorative effects require precision but can dramatically enhance any space when done correctly.
Popular Faux Techniques: – Sponging: Use a sponge to dab paint onto surfaces for a mottled effect. – Rag Rolling: Roll a wrinkled rag dipped in paint over walls to create texture. – Marbling: Employ small brushes and glazes to simulate veining patterns found in marble.
| Technique | Tools Required | Difficulty Level |
| Sponging | Sea sponge, tray, latex/acrylic paint | Easy |
| Rag Rolling | Cotton rags, paintbrush | Moderate |
| Marbling | Fine-tip brush, glaze | Advanced |
Cutting-In Edges Like a Pro
Cutting-in is the technique of painting clean edges where walls meet ceilings or trim without using painter’s tape. While it may take practice, mastering this skill will save time and improve accuracy.
- Use an angled sash brush for better control.
- Load only the tip of your brush with paint to minimize drips.
- Steady your hand by bracing against nearby surfaces when possible.
For beginners looking to sharpen their skills before attempting freehand cutting-in: – Practice on cardboard or scrap surfaces until comfortable with brush control.
Correcting Common Mistakes During Advanced Painting
| Problem | Solution |
| Paint Runs/Drips | Sand down once dry; apply another layer |
| Uneven Finish | Sand lightly & reapply consistent coat |
| Visible Brush Strokes | Use higher-quality brushes/rollers |
Maintaining patience while addressing these issues helps deliver flawless outcomes without compromising quality.
By incorporating these strategies into your workflow—layering properly, experimenting with blending/faux textures—your finished projects will reflect professionalism and attention-to-detail unmatched by standard approaches.
Using Paint Sprayers Efficiently to Save Time and Achieve Flawless Coverage
Paint sprayers are an invaluable tool for both professional painters and DIY enthusiasts. They allow for quick application, smooth finishes, and the ability to cover large areas in a fraction of the time it would take with traditional brushes or rollers. However, to make the most of a paint sprayer, it’s essential to understand how to use it efficiently and effectively.
Benefits of Paint Sprayers
- Speed: Paint sprayers can cover large surfaces in less time compared to brushes or rollers.
- Even Application: They ensure consistent coverage without streaks or texture.
- Versatility: Suitable for various surfaces, including walls, furniture, fences, ceilings, and more.
- Accessibility: Paint sprayers can easily reach corners, crevices, and edges.
Types of Paint Sprayers
| Type of Sprayer | Key Features | Best For |
| Airless Sprayer | High-pressure application; no air compressor needed | Large surfaces like walls and exteriors |
| HVLP (High Volume Low Pressure) | Precise control; reduced overspray | Detailed work like furniture or cabinets |
| Compressed Air Sprayer | Uses an air compressor; smooth finish | Small projects requiring high-quality results |
Preparing Your Equipment
- Choose the Right Tip: Different tips cater to specific types of paints (e.g., thinner finishes like stains require smaller tips).
- Strain the Paint: Use a mesh strainer to remove any impurities that could clog the nozzle.
- Adjust Pressure Settings: Refer to your sprayer’s manual for guidance on pressure adjustments based on paint type.
- Test Spray Pattern: Before beginning your project, spray onto cardboard or scrap material to check for consistency.
Tips for Efficient Painting with Sprayers
- Maintain a consistent distance from the surface (usually 10–12 inches).
- Use smooth, sweeping motions rather than tilting or holding the sprayer stationary.
- Overlap each pass by about 50% to avoid missed spots or uneven layers.
- Keep your movements even—speeding up or slowing down can result in inconsistent coverage.
- Wear protective gear such as goggles, gloves, and a respirator mask to safeguard against fumes and overspray.
Common Mistakes and How to Avoid Them
- Skipping Masking: Always mask off areas not intended for painting (e.g., trim, windows). Overspray can happen even with precise techniques.
- Not Diluting Properly: Some paints may require thinning before use with certain sprayers; check manufacturer recommendations.
- Rushing Through Cleaning: Failing to clean your equipment thoroughly after use will lead to clogs and reduce its lifespan.
Quick Cleaning Checklist: – Empty leftover paint into its original container. – Flush the system with an appropriate cleaning solution (water for latex paints; solvent-based cleaners for oil-based paints). – Disassemble removable parts like nozzles and filters for detailed cleaning.
Final Thoughts
Mastering a paint sprayer involves preparation, practice, and technique refinement. While it may seem intimidating at first glance, investing time in learning how your specific model works will significantly improve your results over time. By following these tips and avoiding common pitfalls, you’ll streamline your painting projects while achieving professional-grade finishes every time you use this versatile tool.
- Comprehensive Guide to House Painting Toledo OH for Beginners
- Exploring House Painting in Toledo OH: Different Types of Paint and Their Best Uses
- Essential Tips and Tricks for Painters Toledo OH Beginners
- Comprehensive Guide to House Painting Toledo OH: Tips for Inside and Out
- Expert Interior Painting Tips from a Leading Painting Company Toledo OHHow Often Should You Repaint
- Your Home with Painters Toledo OH and Why
- Understanding the Differences Between Interior and Exterior Paint with a Painting Company Toledo OH