Giving your home a fresh coat of paint is one of the most cost-effective ways to revamp your space. However, achieving a flawless finish requires preparation, attention to detail, and the right techniques. Below, we’ve compiled some expert tips to help you tackle your next interior painting project like a pro.
Plan Your Project
Before starting, it’s essential to plan your painting project thoroughly. Ask yourself the following questions:
– What areas need painting?
– Have you selected specific colors and finishes?
– Do you have all necessary tools and materials?
Creating a checklist can prevent last-minute trips to the store and help streamline your process.
Surface Preparation: The Key to Success
A smooth finish starts with properly preparing walls and surfaces. Follow these steps for optimal preparation:
1. Clean Surfaces: Dust, grease, or dirt can compromise paint adhesion. Wash walls with soap and water or use a degreasing cleaner for tougher stains. Allow surfaces to dry completely.
2. Repair Damage: Fill in cracks, dents, or holes using spackle or joint compound. Sand the patched areas until level with the rest of the wall.
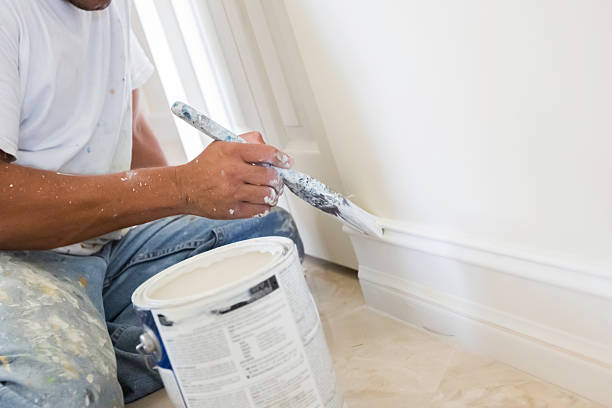
3. Remove Hardware: Take down fixtures such as outlet covers, curtain rods, or hooks to ensure clean edges around these zones. 4. Tape Edges: Use painter’s tape along baseboards, moldings, door frames, and windowsills for crisp lines during painting.
By taking these preparatory measures seriously, you establish a strong foundation for achieving professional results.
Select High-Quality Paints and Brushes
Investing in high-quality materials is another critical step toward success: – Paint: Choose durable paints from reputable brands offering good coverage. – Brushes & Rollers: – For corners/edges: Use angled brushes (2-inch size works well).
– For large areas: Select rollers with appropriate nap thickness based on your wall’s texture (e.g., shorter nap for smooth surfaces; thicker nap for textured walls).
| Paint Type | Best For | Finish Options |
| Latex Paint | Easy cleanup; quick drying | Matte, Eggshell, Satin |
| Oil-Based Paint | Durability | Glossy |
Master Painting Techniques
Even if you’re new to DIY painting projects, adopting proper methods ensures even coverage without streaks or drips.
- Begin by painting edges around ceilings, doors/windows using an angled brush (“cutting in”). This makes it easier when rolling larger sections.
- Divide walls into smaller sections — work one area at time before moving onto next zone. 3 . “Rolling Technique” : Avoid overloading rollers else dripping likely happens , focus more lighter multiple passes instead heavy/single
Selecting the Perfect Paint Finish for Interior & Exterior Painting Toledo OH
Selecting the right paint finish is a crucial step in ensuring your painting project meets both functional and aesthetic goals. Different finishes not only impact the look of your space but also determine its durability, maintenance needs, and overall performance. Below is an expert guide to help you choose the most appropriate paint finish for every room and surface in your home.
Common Types of Paint Finishes
- Characteristics: Non-reflective, smooth appearance; conceals imperfections effectively.
- Best For: Ceilings, low-traffic areas like bedrooms or formal dining rooms.
- Pros: Excellent at hiding wall flaws like dents or patches.
- Cons: Difficult to clean; not ideal for spaces prone to dirt.
- Characteristics: Slight sheen with a soft, velvety look.
- Best For: Living rooms, hallways, and medium-traffic areas requiring some durability.
- Pros: Easier to clean than matte finishes while still minimizing wall imperfections.
- Cons: Not as durable as high-sheen options.
- Characteristics: Smooth with a subtle shine; more reflective than eggshell but less than semi-gloss.
- Best For: Kitchens, bathrooms, and laundry rooms due to its moisture resistance and easy cleaning properties. Also suitable for trims and moldings.
- Pros: Versatile; balances aesthetics with practicality.
- Cons: Can highlight surface flaws if not applied correctly.
- Characteristics: Noticeable shine that reflects light well; hardwearing.
- Best For: High-moisture areas (bathrooms/kitchens), trim work, doors, or cabinets.
- Pros: Durable and easy to clean with just a damp cloth.
- Cons: Emphasizes wall imperfections more than low-sheen finishes.
- Characteristics: The shiniest option available; offers a polished reflective surface.
- Best For:** High-traffic surfaces like furniture, cabinetry, doors, and architectural details..
Choosing the Right Paint Finish for Every Room and Surface
Selecting the appropriate paint finish is a critical step in any painting project as it determines both the appearance and durability of your painted surfaces. Each type of finish has its unique characteristics, making certain finishes better suited for specific rooms or surfaces. Below is an expert guide to help you make informed decisions when choosing a paint finish.
Types of Paint Finishes
- Appearance: Non-reflective with a smooth, velvety texture.
- Best For: Ceilings, low-traffic areas like bedrooms or dining rooms.
- Advantages: Masks imperfections in walls due to its lack of sheen.
- Considerations: More prone to staining and harder to clean than other finishes.
- Appearance: Soft sheen that’s slightly more reflective than matte finishes.
- Best For: Living rooms, hallways, and areas with moderate foot traffic.
- Advantages: More durable than flat paint and easier to clean while still offering a subtle look.
- Appearance: Smooth with a light gloss that enhances depth and color vibrancy.
- Best For: Kitchens, bathrooms, laundry rooms, and children’s bedrooms where durability is key.
- Advantages: Offers a good balance between aesthetics and durability; resistant to moisture and scrubbing.
- Appearance: Noticeable shine that reflects light well, giving surfaces a polished look.
- Best For: Trim work (such as baseboards), doors, cabinets, kitchens, and bathrooms.
- Advantages: Resistant to moisture and stains; easy to clean; ideal for high-traffic areas.
- Appearance: Shiny with an almost glass-like reflective quality.
- Best For: Furniture pieces, cabinets, doors, or decorative moldings.
- Advantages: The most durable of all finishes; highly resistant to dirt and easy to wipe clean.
- Considerations: Can highlight surface imperfections due to its reflective nature.
Matching Paint Finishes with Room Functionality
| Room/Surface | Recommended Finish | Reason |
| Living Room | Eggshell or Satin | Durable yet retains a subtle appearance |
| Kitchen | Satin or Semi-Gloss | Resistant to moisture and grease |
| Bedroom | Flat or Eggshell | Comfortable non-reflective look |
| Bathroom | Satin or Semi-Gloss | Moisture-resistant |
| Ceilings | Flat | Hides surface flaws |
| Trim & Doors | Semi-Gloss or High Gloss | Durable against wear-and-tear |
Factors to Consider When Choosing Finishes
- Traffic Levels: Rooms like hallways often experience higher foot traffic and wall contact compared to bedrooms.
- Light Reflection: High-gloss paints can make smaller spaces appear larger by reflecting light but may also magnify flaws in uneven surfaces.
- Cleaning Needs: Families with young children or pets may benefit from more washable options like satin or semi-gloss finishes.
- Surface Imperfections: If your walls have dents or cracks that are difficult to repair fully, opt for matte finishes which conceal such flaws better than glossier choices.
By understanding the different properties of each paint finish along with practical considerations like room function and maintenance requirements, you can achieve long-lasting results tailored perfectly for your space needs while enhancing overall interior aesthetics effortlessly.

The Importance of Priming and How It Transforms Your Painting Project
Priming is a crucial yet often overlooked step when tackling a painting project. It serves as the foundation for achieving a long-lasting, professional-quality finish. Whether you’re painting walls, ceilings, furniture, or cabinetry, priming plays a transformative role by improving adhesion, enhancing color vibrancy, and ensuring durability. Below is an in-depth look at why priming is essential and how it can elevate your project.
What Does Primer Do?
- Improves Adhesion: Primer ensures the paint sticks properly to surfaces such as drywall, wood, metal, or even glossy finishes like tiles.
- Blocks Stains: It seals in stains caused by grease, water damage, or smoke to prevent them from bleeding through your new paint.
- Creates Evenness: A good primer smooths out differences between porous and non-porous areas for a consistent finish.
- Enhances Durability: By strengthening the bond between surface and paint layers, primer contributes to longer-lasting results.
When Should You Use Primer?
- Bare Drywall: Drywall absorbs paint unevenly; primer creates a uniform base.
- Bare Wood: Wood grain can soak up paint or display knots without proper priming.
- Transitioning from dark to light colors (or vice versa) benefits from primer to reduce coats of paint needed for opacity.
- Shiny surfaces like laminate or previously painted high-gloss require bonding primers for better adhesion.
- Watermarks, nicotine stains, and other discolorations should be sealed with stain-blocking primers.
- Metal surfaces need rust-inhibiting primers; outdoor projects require weather-resistant options.
Types of Primers
| Type | Best For | Advantages |
| Latex Primer | Drywall, softwoods | Quick-drying; low odor; eco-friendly |
| Oil-Based Primer | Hardwoods, metals | Excellent stain blocking; durable |
| Shellac-Based | Severe stains (e.g., smoke) | Maximum stain coverage; fast drying |
| Bonding Primer | Glossy/non-porous surfaces | Superior adhesion |
Tips for Applying Primer
- Start with clean surfaces—dust and grease can hinder proper application.
- A roller works best for large areas like walls.
- Brushes are ideal for corners and detailed spaces.
- Apply thin layers instead of one thick coat to avoid drips or uneven texture.
- Allow adequate drying time before adding your topcoat (refer to manufacturer guidelines).
By integrating priming into your workflow thoughtfully—and selecting products suited to your project’s needs—you’ll notice significant improvements in both appearance and longevity of any painted surface.
Understanding VOCs and Choosing Eco-Friendly Paint Options
When selecting paints for your home or workspace, understanding volatile organic compounds (VOCs) and their impact on your health and environment is crucial. VOCs are chemicals that easily evaporate at room temperature, releasing gases that can affect indoor air quality and contribute to smog when released outdoors. Choosing eco-friendly, low-VOC, or zero-VOC paints not only ensures safer indoor air but also reduces environmental harm.
What Are VOCs?
These compounds can cause short-term issues like eye irritation, headaches, or dizziness. Long-term exposure may lead to more serious health concerns, particularly for individuals with respiratory conditions or sensitivity to chemicals.
Benefits of Choosing Low-VOC or Zero-VOC Paint
- Healthier Indoor Air Quality: Reduces the risk of respiratory issues caused by harmful emissions.
- Eco-Conscious Decision: Minimizes environmental impact through reduced chemical release.
- Low Odor During Application: Makes painting more comfortable for those occupying the space.
- Safer for Vulnerable Groups: Ideal for homes with children, elderly residents, or pets.
How to Identify Eco-Friendly Paint Options
- Low-VOC Labeling: Paints must contain fewer than 50 grams of VOCs per liter to qualify as low-VOC.
- Zero-VOC Paints: Contain less than 5 grams of VOC per liter.
- Green Certifications: Check for certifications such as Green Seal®, GREENGUARD®, or LEED compliance.
- Natural Ingredients: Some eco-paints use natural materials like clay or milk proteins.
Comparison of Conventional vs. Eco-Friendly Paint
| Feature | Conventional Paint | Eco-Friendly Paint |
| VOC Content | High | Low to zero |
| Odor | Strong | Mild |
| Environmental Impact | Significant | Minimal |
| Durability | Comparable (varies by brand) | Comparable (varies by brand) |
Tips for Using Eco-Friendly Paint Effectively
- Ensure good ventilation while painting by opening windows or using fans.
- Store leftover paint in a sealed container to prevent it from releasing any residual emissions over time.
- Dispose of unused paint responsibly—refer to local guidelines on recycling hazardous materials.
By prioritizing eco-friendly paints with low VOC levels, you create a sustainable living space that benefits both the occupants’ health and the environment. Making informed choices about your paint products ensures a balance between aesthetics and responsibility toward our planet’s well-being.
Color Psychology and How to Select the Perfect Shades for Your Space
Choosing the right colors for your home or workspace is not just about aesthetics; it’s about creating an environment that feels harmonious and serves its intended purpose. Color psychology helps us understand how different shades influence mood, energy levels, and even productivity. By leveraging this knowledge, you can select colors that not only enhance the look of your space but also affect how you feel and function within it.
The Psychological Effects of Colors
- Blue: Often associated with calmness, focus, and serenity. Ideal for bedrooms, home offices, or areas where relaxation or concentration is key.
- Red: A bold color linked to energy, passion, and warmth. Suitable for dining rooms or social spaces but best used sparingly in smaller areas.
- Yellow: Evokes feelings of happiness, optimism, and creativity. Works well in kitchens or living rooms where natural light is abundant.
- Green: Symbolizes balance, renewal, and tranquility. Perfect for bedrooms or bathrooms due to its soothing effects.
- Neutral Shades (Gray, Beige): Create a sense of elegance and versatility. These tones are ideal for shared spaces like living rooms as they pair well with accent colors.
Tips for Selecting the Right Colors
- Consider Room Functionality
Think about how each room will be used: - For high-energy spaces (like workout rooms), brighter hues such as orange or yellow can inspire activity.
- For rest areas (such as bedrooms), softer tones like blues or lavenders promote relaxation.
- Assess Lighting
Natural light affects how colors appear throughout the day: - Warm-toned lighting enhances yellows and reds.
- Cool-toned lighting works better with blues and greens.
- Use Accent Walls Strategically
If you’re hesitant about bold colors: - Paint just one wall in a vibrant shade while keeping others neutral.
- This creates visual interest without overwhelming the space.
- Test Paint Samples on Walls
Always apply test swatches before committing: - View samples under different lighting conditions (morning sunlight vs evening artificial light).
- Allow paint to dry fully before evaluating its true tone.
- Factor Furnishings Into Your Choice
Ensure that wall colors complement existing furniture and décor: - Neutral furniture pairs well with bolder wall shades.
- Vibrant furniture may require softer backgrounds.

Table of Common Colors by Room Purpose
| Room Type | Recommended Colors | Reasons |
| Bedroom | Blue, Lavender | Promotes relaxation and restful sleep |
| Kitchen | Yellow, White | Enhances brightness; encourages positivity |
| Living Room | Beige, Gray | Versatile base; works with varied accents |
| Home Office | Green, Light Blue | Boosts concentration while reducing stress |
| Dining Area | Red, Orange | Encourages appetite; fosters social energy |
Avoiding Common Mistakes While Choosing Colors
- Overlooking Undertones: Many paints have subtle undertones that may clash with surrounding elements like flooring or upholstery.
- Skipping Primer: The underlying surface color can alter how your chosen shade appears on walls.
- Ignoring Scale: Bright or dark shades may dominate smaller spaces more than expected—opt for lighter tones in compact areas.
By understanding color psychology and approaching selection with intention, you can transform any space into one that reflects both personal style and practical function effortlessly.
Essential Tools and Materials for a Smooth and Professional House Painting Toledo OH Process
When it comes to achieving a professional-quality paint job at home, having the right tools and materials is just as important as mastering the technique. The proper equipment not only ensures better results but also makes the entire process more efficient. Below is a guide to the essential tools and materials you’ll need for a successful painting project.
Basic Tools You’ll Need
- Choose quality brushes for precision and durability—typically with synthetic bristles for water-based paint or natural bristles for oil-based paint.
- 1–2-inch brushes for trims.
- 2–4-inch brushes for larger surfaces.
- Select rollers based on surface texture:
- Smooth surfaces: Use short-nap rollers (¼–⅜ inch).
- Textured walls: Opt for medium- or long-nap rollers (½ inch or more).
- Don’t forget a sturdy roller frame and an extendable handle for hard-to-reach areas.
- Use high-quality painter’s tape to achieve crisp, clean edges without paint bleeding onto adjacent surfaces.
- Protect floors, furniture, and other fixtures using canvas drop cloths or plastic sheeting. Canvas is typically reusable and less prone to slipping.
- A sturdy tray with disposable liners makes cleaning up easier while accommodating a roller-friendly layout.
- For reaching ceilings or higher sections of walls, ensure you have a stable ladder that supports safe movement during painting.
Additional Materials to Consider
- Primer: A layer of primer enhances adhesion, improves coverage, and creates an even base layer.
- Sandpaper (Various Grits): For smoothing out uneven surfaces before painting.
- Painter’s Rags: Keep lint-free rags handy for wiping up spills or touch-ups during your work.
- Stir Sticks: Properly mix your paint to maintain consistent color throughout your project.
- Buckets: Use a clean bucket if you’re mixing multiple cans of paint together or working with large quantities.
Optional but Helpful Tools
- Edging tools: Useful when painting around trim, windows, or tight corners.
- Paint sprayers: Suitable for larger projects where fast application is needed.
Paint Coverage Table
| Paint Type | Approximate Coverage (per gallon) | Best Used On |
| Flat/Matte | 250–400 sq.ft | Ceilings, low-traffic areas |
| Eggshell | 300–400 sq.ft | Bedrooms, living rooms |
| Satin | 300–400 sq.ft | Kitchens, bathrooms |
| Semi-gloss | 350–450 sq.ft | Doors, trim |
| High-gloss | 400+ sq.ft | Furniture, accent details |
Preparing Your Workspace
- Clear the area of furniture wherever possible; cover immovable objects with drop cloths.
- Clean walls thoroughly using mild soap and water to remove dirt or grease that can prevent proper adhesion.
- Repair any cracks or holes in the surface using spackle; sand smooth once dry.
- Ensure adequate ventilation in your workspace to reduce fumes from paints and primers.
Using these tools and materials effectively will help ensure smooth application, professional-looking results, and reduced frustration throughout your DIY process—setting you up for success from start to finish!
Expert Tips from Painters Toledo OH to Paint Like a Pro and Avoid Mistakes
Achieving a professional-looking paint job at home requires more than just applying paint to the walls. Understanding key techniques and avoiding common pitfalls can save you time, effort, and money while ensuring top-notch results. Here’s how you can master the art of painting like a pro.
Start with Proper Preparation
Preparation is the cornerstone of any successful painting project. Skipping this step often leads to uneven finishes or peeling paint. Follow these steps:
– Clean the Surface: Dirt, grease, or dust can prevent paint from adhering properly. Use a mild detergent solution for cleaning walls and allow them to dry thoroughly.
– Patch and Sand: Fill holes or cracks with spackling paste and sand the surface smooth once it dries. This ensures an even base for painting.
– Tape Like a Pro: Use high-quality painter’s tape around edges, trim, and other areas where you don’t want paint to bleed.
Use Quality Tools
Selecting the right tools can significantly impact your results. Invest in good-quality brushes, rollers, and painter’s tape. Here’s what you’ll need and their uses: | Tool | Purpose | |————–|——————————————————| | Angled Brush | Perfect for cutting in corners and edges | | Roller | Ideal for covering large wall surfaces quickly | | Drop Cloth | Protects floors and furniture from accidental drips | | Paint Tray | Helps evenly distribute paint on your roller |
Cheap tools may save money upfront but can lead to uneven application or shedding bristles during use.
Master Professional Application Techniques
- Cut In First: Start by “cutting in” around edges, corners, door frames, ceilings, and trim using an angled brush before filling in larger areas with a roller.
- Load Your Brush/Roller Correctly: Avoid overloading your brush or roller with paint; this reduces drips and ensures smoother application.
- Use the “W” Technique: When rolling on paint for walls, use a “W” motion without lifting the roller from the wall until it’s evenly spread.
- Work in Sections: Divide walls into manageable sections to maintain a wet edge while painting—this prevents visible lap marks.
- Thin Coats Are Key: Apply multiple thin coats rather than one thick coat; this improves durability and provides better coverage.
Common Painting Mistakes to Avoid
Even seasoned painters can fall prey to simple mistakes that compromise their results. Watch out for these common errors: – Skipping Primer: Unprimed surfaces result in uneven color absorption or poor adhesion. – Rushing Between Coats: Always allow sufficient drying time between coats as per manufacturer instructions. – Neglecting Lighting Conditions: Poor lighting may hide missed spots during application; ensure adequate lighting throughout your workspace. – Painting Over Damaged Surfaces: Applying paint over loose plaster or peeling old layers will only worsen imperfections.
Finishing Touches
After completing your painting project: – Remove painter’s tape while the paint is still slightly tacky to avoid peeling off fresh layers. – Inspect your work under natural light (if possible) for touch-ups. – Clean brushes, rollers, trays promptly after use to preserve their lifespan.
By applying these techniques methodically and avoiding common blunders along the way, you’re well on your way toward achieving professional-grade results on every painting project you tackle at home!
- Comprehensive Guide to House Painting Toledo OH for Beginners
- Exploring House Painting in Toledo OH: Different Types of Paint and Their Best Uses
- Essential Tips and Tricks for Painters Toledo OH Beginners
- Comprehensive Guide to House Painting Toledo OH: Tips for Inside and Out
- Expert Interior Painting Tips from a Leading Painting Company Toledo OHHow Often Should You Repaint
- Your Home with Painters Toledo OH and Why
- Understanding the Differences Between Interior and Exterior Paint with a Painting Company Toledo OH